Dynamics 365 应用内的消息提醒(站内信)
本文将以一个场景讲述如果在 Dynamics CRM App 中使用 “消息提醒(Notification)”,我将使用三种推送方式为用户创建消息提醒:
- Cloud Flow
- Client API
- Csharp(C#)
准备:启用应用消息通知
Power Apps --> 点击菜单栏中 “App” --> 找到自己的应用 --> 点击 “三个点” --> 点击 “编辑”
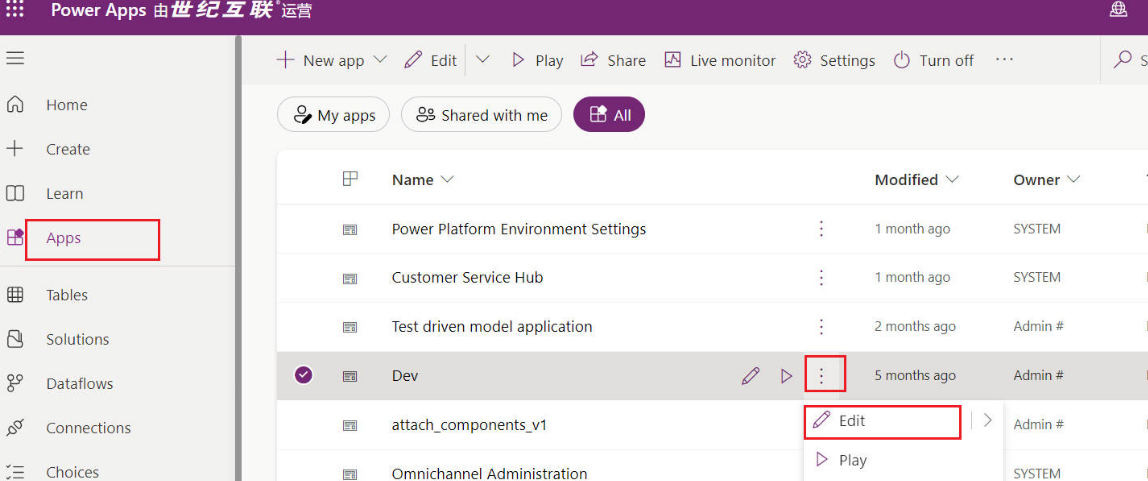
Power Apps 界面
点击应用编辑页面上方的 Settings 按钮
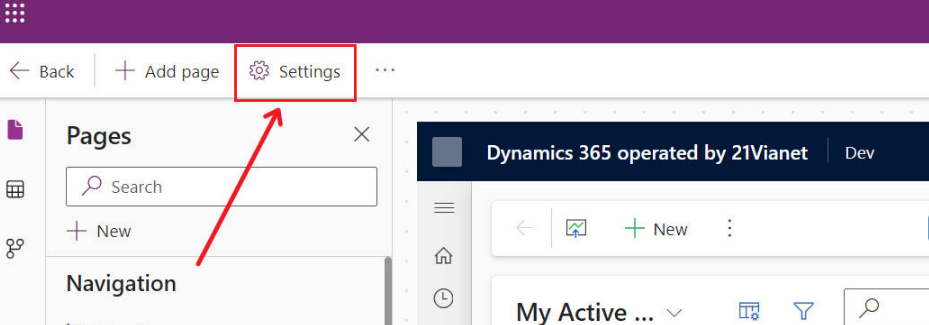
Power Apps App Setting
点击 Features 选项卡 --> 启用 In App Notification --> 保存
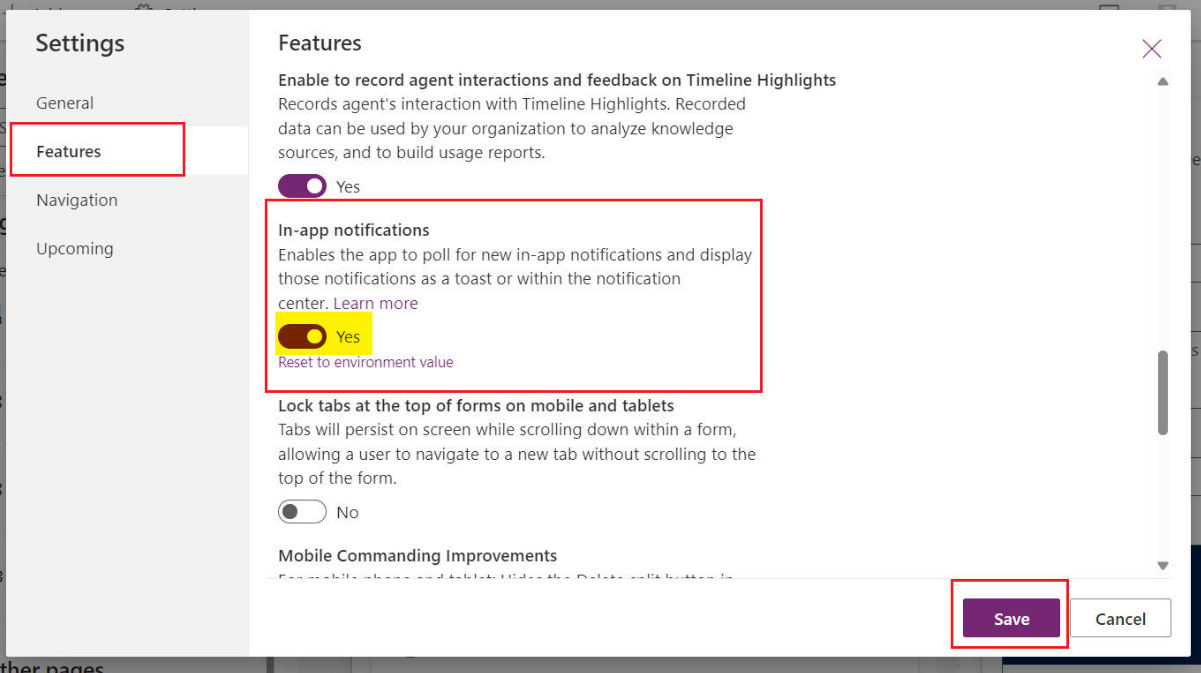
启用消息提醒
如果一切顺利,可以在 Table 中看到 Notification 表
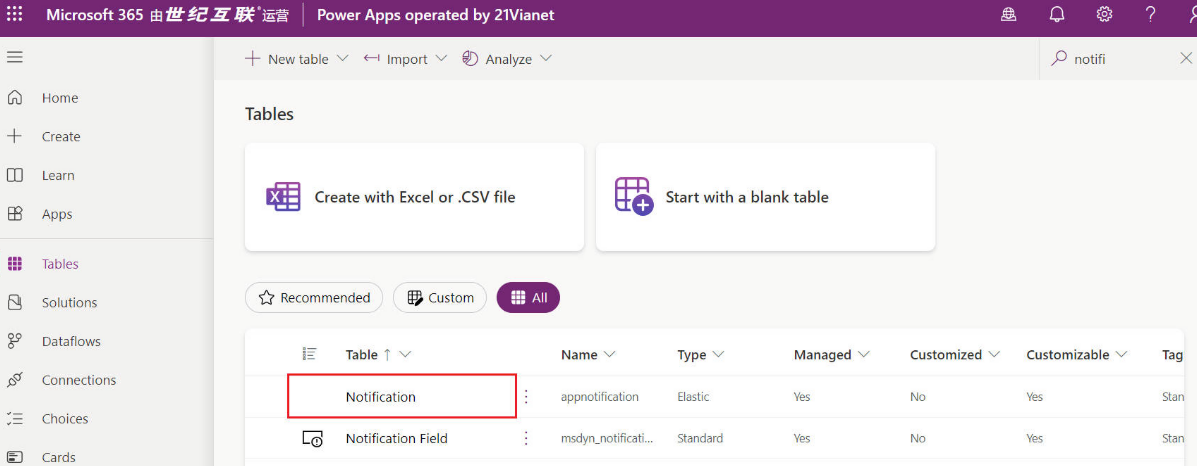
Notification 表
方式 1.使用 Cloud Flow
Setp 1. 新建 Flow
打开解决方案 --> 新建 --> Automation --> Cloud flow --> Automated

Create Cloud Flow 1
输入一个有意义的 Flow 名称 --> 通过模糊搜索(输入:Dataverse) --> 选择 When a row is added, modified or deleted 触发器 --> Create
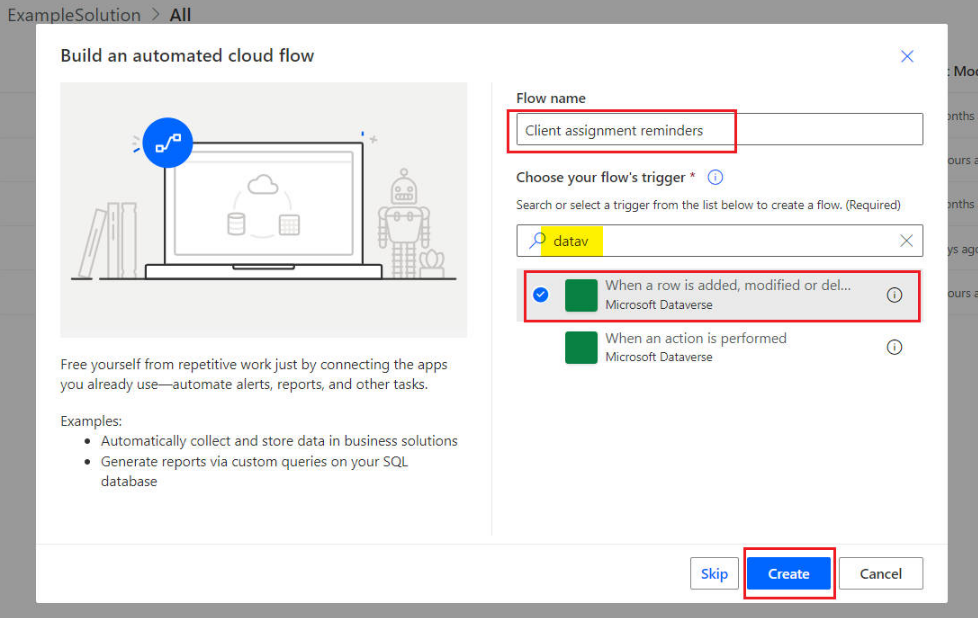
Create Cloud Flow 2
Setp 2. 配置 Flow
(1)配置 When a row is added, modified or deleted 触发器,然后点击 “+New Step”
- Change type:Modified
- Table name:Accounts
- Scope:Organization
- Select columns:ownerid
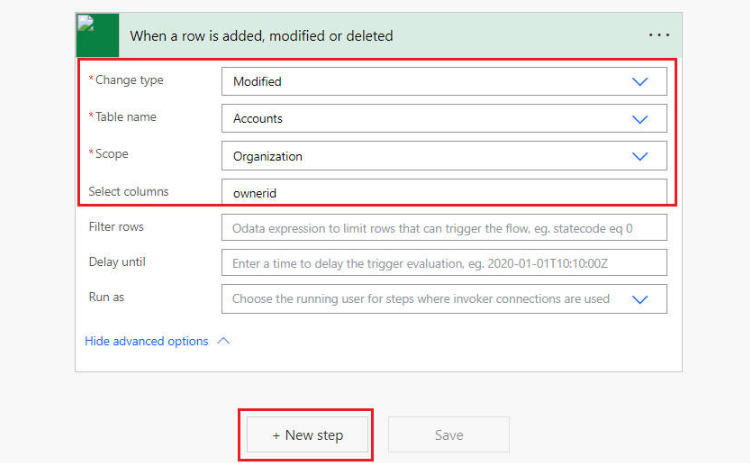
配置触发器
(2)通过模糊搜索(输入:Dataverse),选择 Add a new row 操作
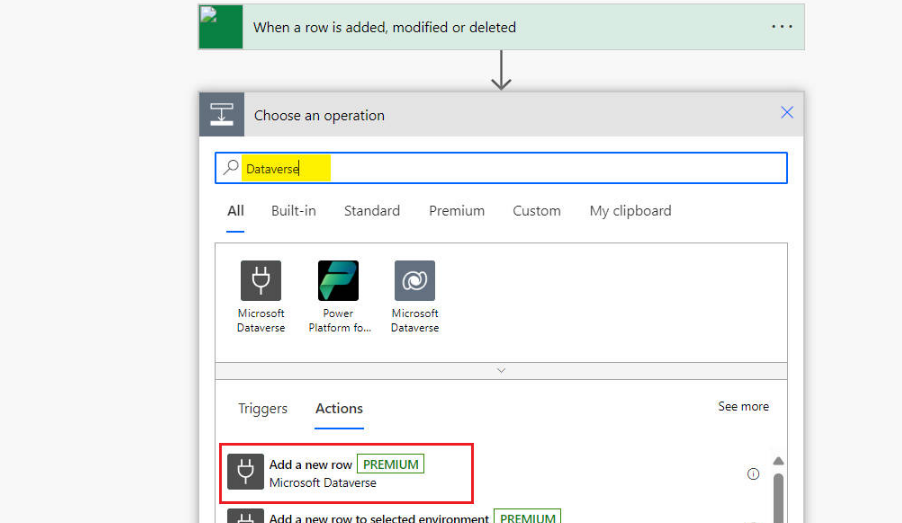
选择操作
(3)配置 Add a new row 操作,然后点击保存按钮
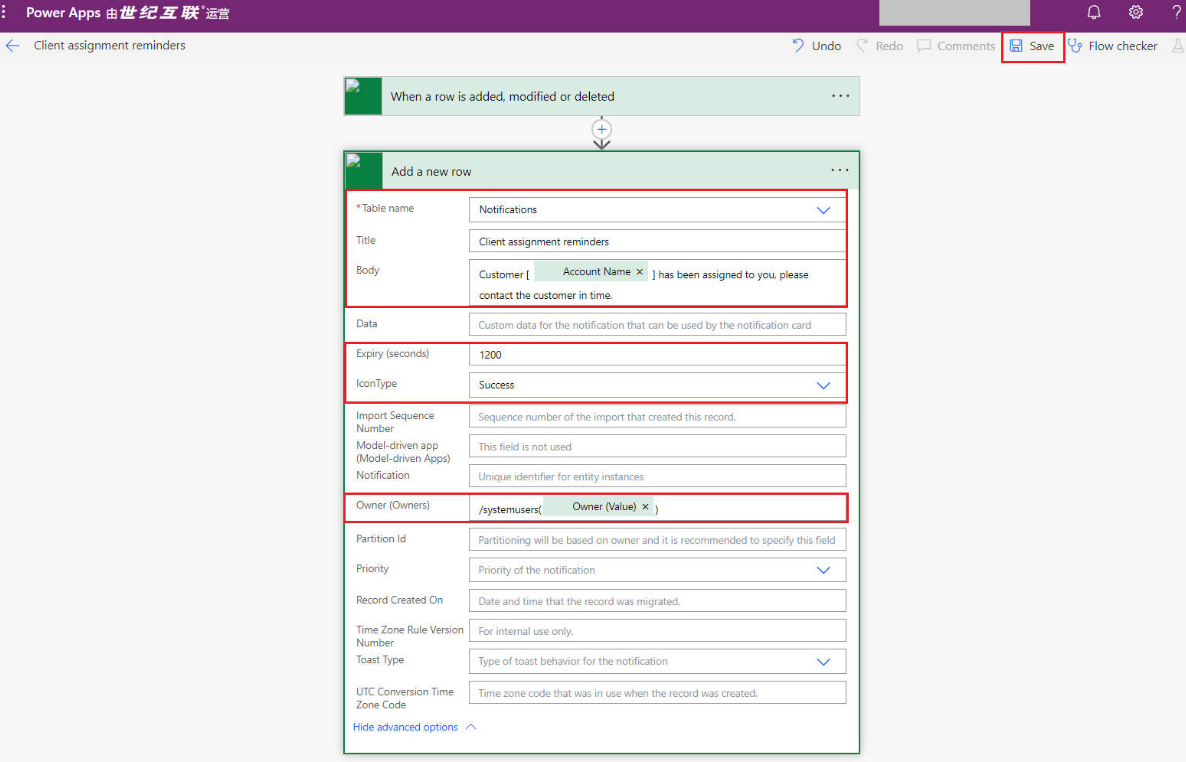
配置操作
提示:变量需要通过 “Add dynamic content” 选择
- Table name:选择
Notifications - Title:输入
Client assignment reminders - Body:输入
Customer [变量:Account Name] has been assigned to you, please contact the customer in time. - Expiry (seconds):输入
1200 - IconType:选择
Success - Owner (Owners):输入
/systemusers(变量: Owner(Value)) - Data:输入下面的 Json ,其中 entityLigicalName 输入
account, 和RecordId需要替换
{
    "actions": [
        {
            "title": "Open Account record",
            "data":
            {
                "url": "?pagetype=entityrecord&etn=account&id=变量:Account",
                "navigationTarget": "newWindow"
            }
        }
    ]
}
Setp 3. 测试 Flow
打开一条客户记录,将这条客户记录分派给自己,如果一切顺利的话,你将在右上角看到弹出消息提醒
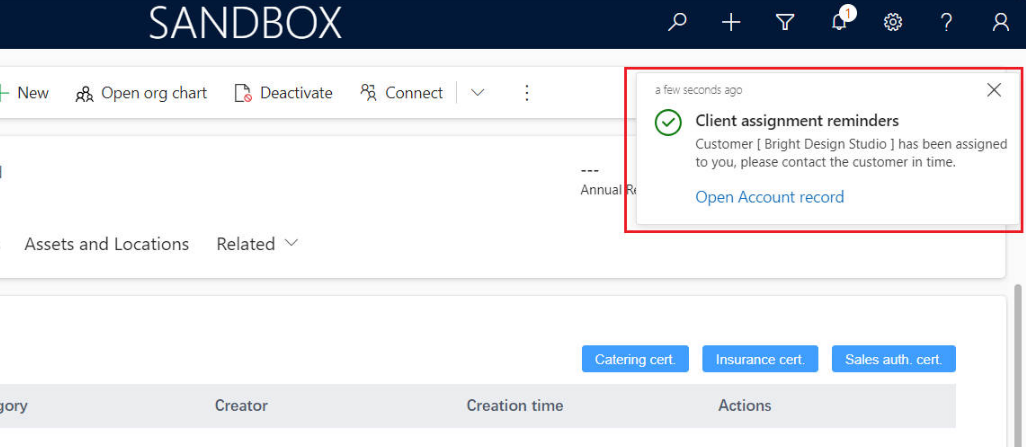
右上角弹出消息提醒
同时,用户在 Power Apps 移动端的应用中,一样能看到消息提醒:
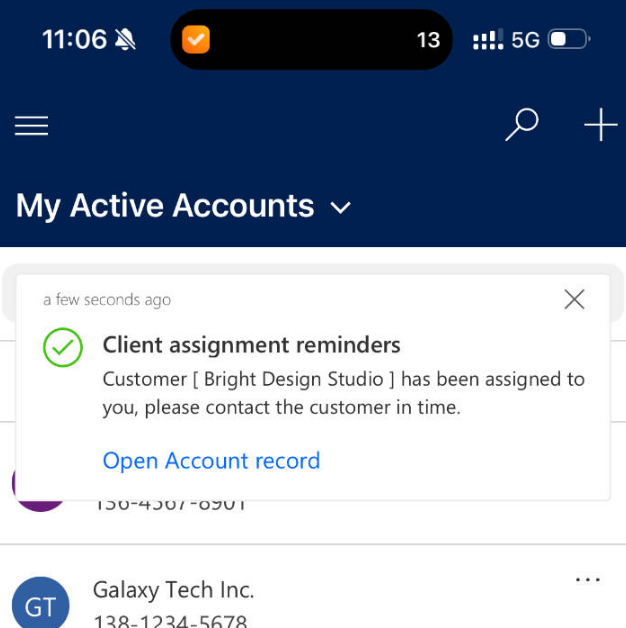
移动端的应用中看到的消息提醒

评论区(暂无评论)